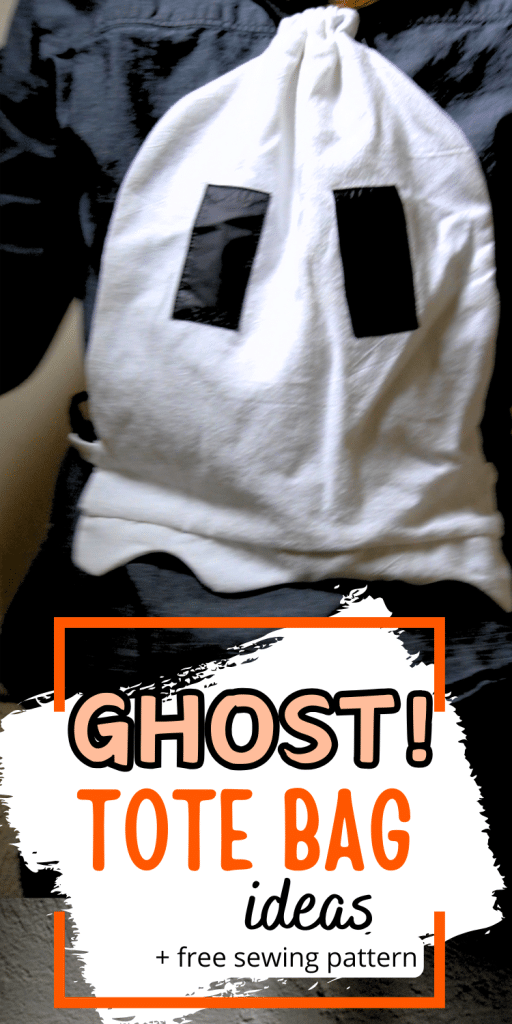
Tutorial: Cute Ghost Drawstring Bag
Learn how to make an adorable ghost drawstring bag with this step by step tutorial. I’ll walk you through how to add the ghost eyes and how to assemble your little ghost backpack using only fabric remnants. This is a great project for beginners or a fun project for anyone who wants to add a little more fun to their Halloween Accessories. Check out the free printable pattern below and cut out the fabric pieces to get started.

Supplies Needed:
(all of my patterns include 1/2″ seam allowance)

Step 1

Prep the ghost eyes
Fold over the seam allowance on the black pieces of fabric and baste in place.

Step 2

sew the eyes to the front of the bag
Pin the eyes in place according to the pattern and edgestitch to sew them to the front of the ghost bag. After sewing, you can remove the basting stitches from the previous step.

Step 3

make a Narrow hem on both sides of the casing pieces
Step 4

fold the casing in half and sew it to the top of the bag front and back
Sew through all layers, then press the casing up, away from the bag.

Step 5

prep the tab pieces
Sew the length of the tabs and then turn them to the right side and press.

Step 6

baste the tabs to the bottom sides of the ghost bag
Step 7

sew the ghost fringe
With right sides together, sew the ghost fringe, leaving the flat side open. Then clip the seam allowance, turn the fringe to the right side and press it.


Step 8

Baste the fringe to the bottom of the ghost bag as shown
Step 9

Sew the front and back of the bag together
When sewing, be careful not to catch the fringe in the side seams. You only want to sew through the fringe along the bottom seam.

Step 10

Turn the bag to the right side and press everything
Step 11

add the drawstring to the casing
You need two pieces of string and they both need to go all the way around, through both casings. One string you’ll insert through the left side, thread it all the way around so it comes back out the left. The other will start on the right side and go all the way around so it comes back out the right.
Then you want to tie each string around the tabs that were sewn in earlier.


Finished!