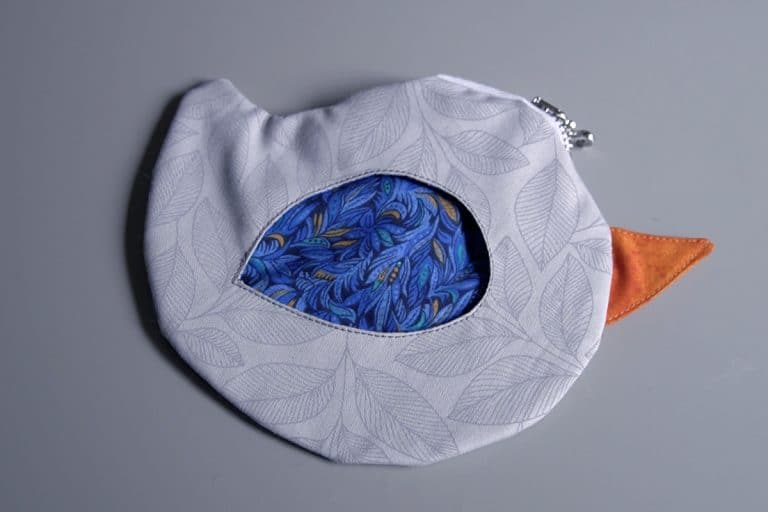
Tutorial: Easter Egg Goody Bag Pouch Using Fabric Scraps
Looking for the perfect goody bag idea for your Easter party this year? Try making this cute and simple Easter egg drawstring pouch. You can use up some leftover scraps of fabric to make a colorful Easter egg design. Check out the free bag pattern below and follow along with the step-by-step instructions.
Supplies Needed:
all of my patterns include 1/2″ seam allowance

Step 1

Arrange you fabric scraps
You can arrange your scraps however you want. I like to use white at the top and the bottom to make it look more like an egg, but this is the stage where you can design your Easter egg however you like it. I recommend cutting straight lines on your scraps because it will make them easier to sew together.
Step 2

sew your scraps together
I recommend finishing the seams on the back (in what ever manner you like best) so that they don’t start to fray over time.
Step 3

cut out your easter egg pieces
Place your pattern pieces on top of your fabric scrap collage and cut out two of the egg pouches.

Step 4

sew the two egg pouch pieces together
With right sides together, sew the two pouch pieces together around the perimeter, leaving the top open. It’s best to finish the seam to make the end pouch more durable and keep it from fraying.

Step 5

Turn the pouch to the right side
Before turning, you might want to clip the curved to give you a smoother curve at the bottom of the pouch.

Step 6

cut out your drawstring casing
you can use what ever fabric scraps you want for this. I had enough scraps to match the top of my egg pieces, so I decided to use that for the sake of simplicity.
Step 7

hem the drawstring casing pieces
Make a narrow hem on both sides of the drawstring casing pieces.

Step 8

sew both the drawstring casing pieces to the upper edge of the bag
Step 9

Press the casing up, away from the bag
Step 10

fold casing over on the inside and stitch
You can ditch stitch or edge stitch, depending on what you are more comfortable with.

Step 11

insert 2 pieces of string through the casing
You need each piece of string to go all the way around, through both casings. One string you’ll insert through the left side, thread it all the way around so it comes back out the left. The other will start on the right side and go all the way around so it comes back out the right.
Finished!