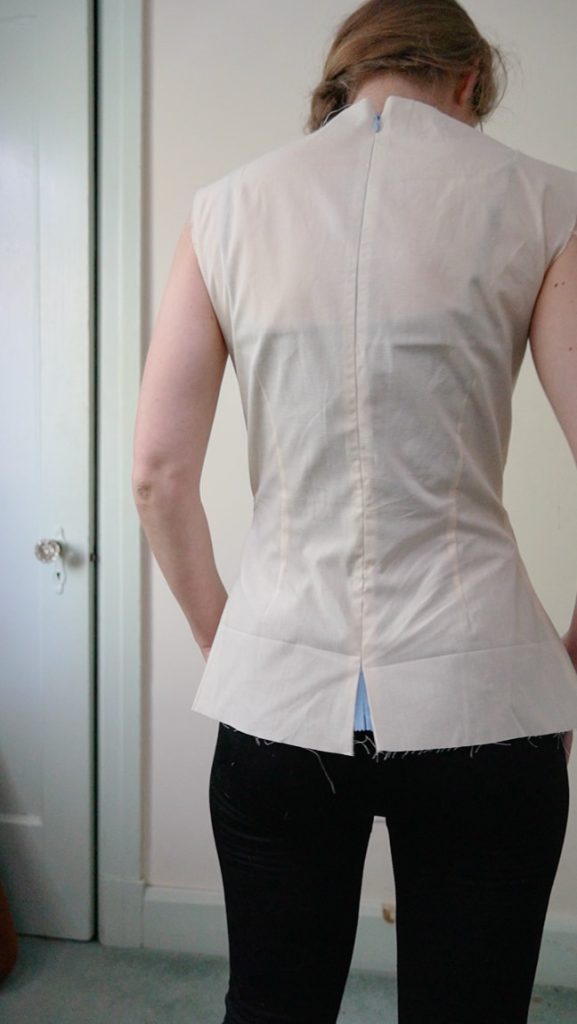
Tutorial: How to Make a Bodice Sloper to Design Your Own Patterns (the back)
A sloper is a base template that you can make to design and sew your own sewing patterns based on your own measurements. This tutorial will walk you through step by step how to take your measurements and how to use those to draw out the back of your sloper.
This is a continuation of the bodice sloper tutorial. The first part showed you how to make the front of your sloper using your measurements, this post will show you how to make the back. Here is part 1 of this, showing you how to make the front of the sloper template.
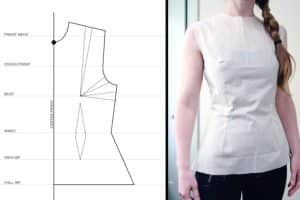
Part 1 of a sloper tutorial. Find instructions for the front of the sloper here
Disclaimer: I am not in any way a professional pattern maker. This is my amateur process for making a sloper that has worked to help me start creating my own patterns. If you’re a beginner at pattern making, my tutorial is a great place to start. However, if you want more precise instructions, I recommend Suzy Furrer’s Bodice Sloper class on Craftsy (not sponsored, I just legitimately found it to be useful)
Supplies Needed:
Measuring and (simple) Calculations:
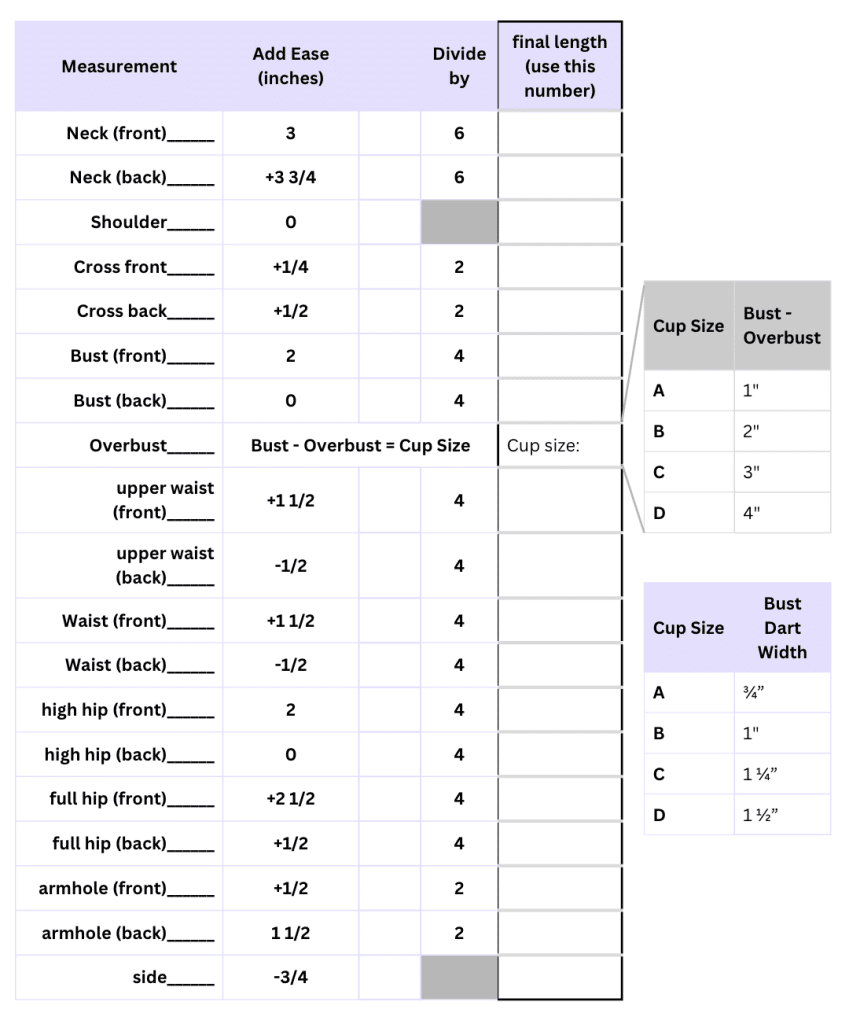
To make a sloper, you need a lot of body measurements. You also need to add ease so the sloper bodice isn’t completely skin tight, and divide the measurements because we’re only working with half the back (so just 1/4 of the body). I’ve created a PDF document with charts and diagrams to help you through the measurement and calculation process.
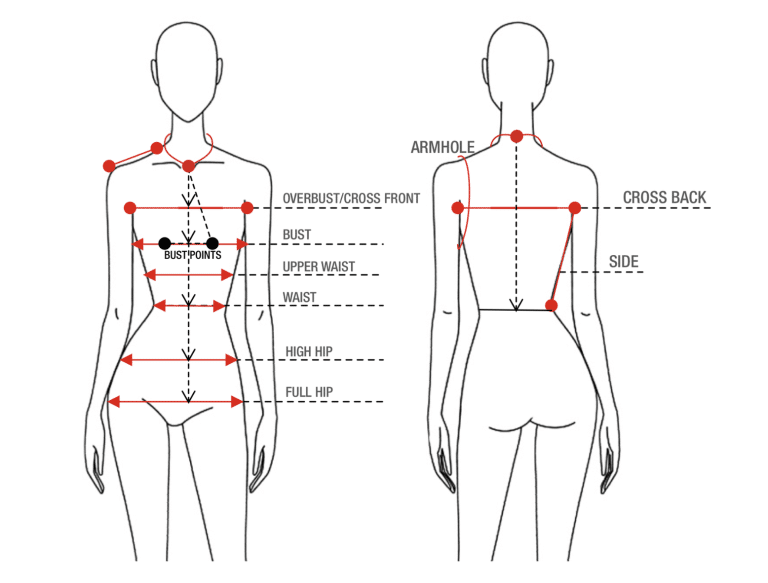
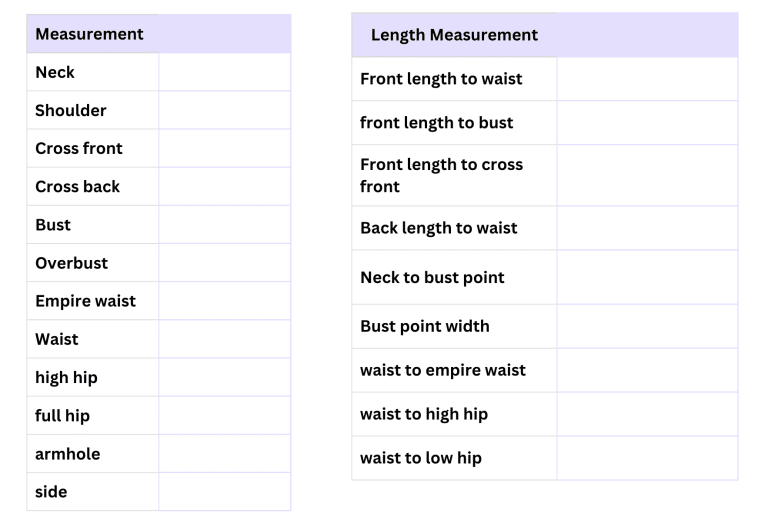
Measurements that you will need:
You will also need to take length measurements so you know the distance between everything:
After you have your measurements, add them to the chart below. First you’ll add ease to each of your measurements. Then you’ll divide the resulting number (since we’re only working with half the back torso) to get your final length. Use the numbers inthe “final length” column while your going through my tutorial.
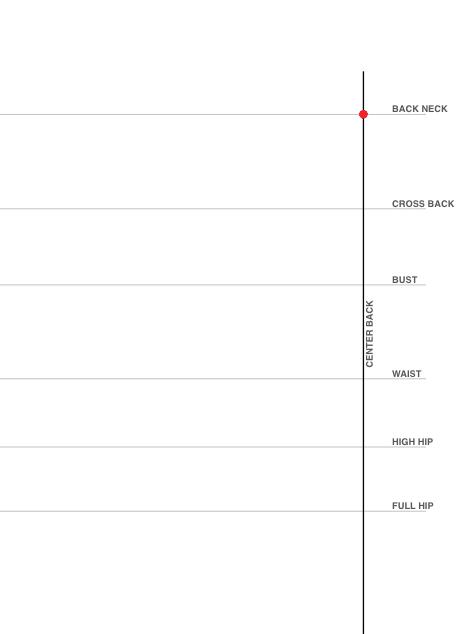
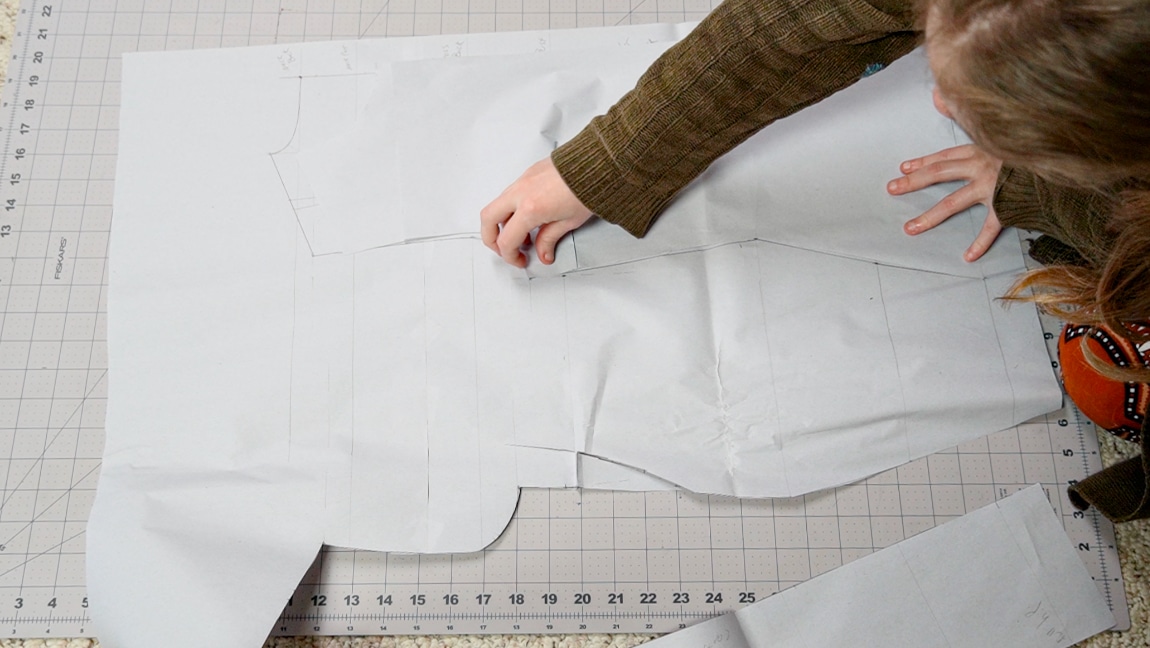
Step 1
draw your back grid
The only part of the back grid that is different from the front is the Back Neck line. This should be slightly higher than the Front Neck line. Then draw a vertical line straight down to be the center back of the sloper.
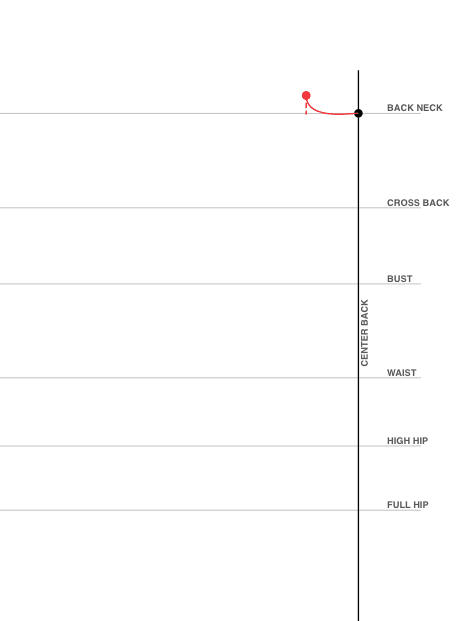
Step 2
draw your center back neckline
Draw a dot on the intersection of the center back and back neck gridlines. Then add your shoulder point 1 inch up from the back neck line, and the Neck (back) calculation for the width of the neckline. Then draw a line connecting the dots.
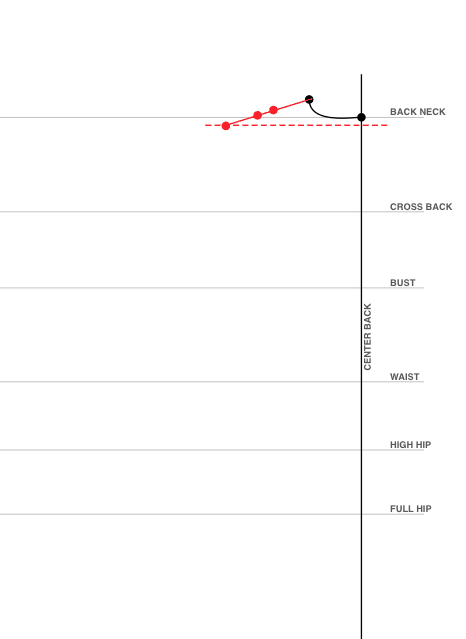
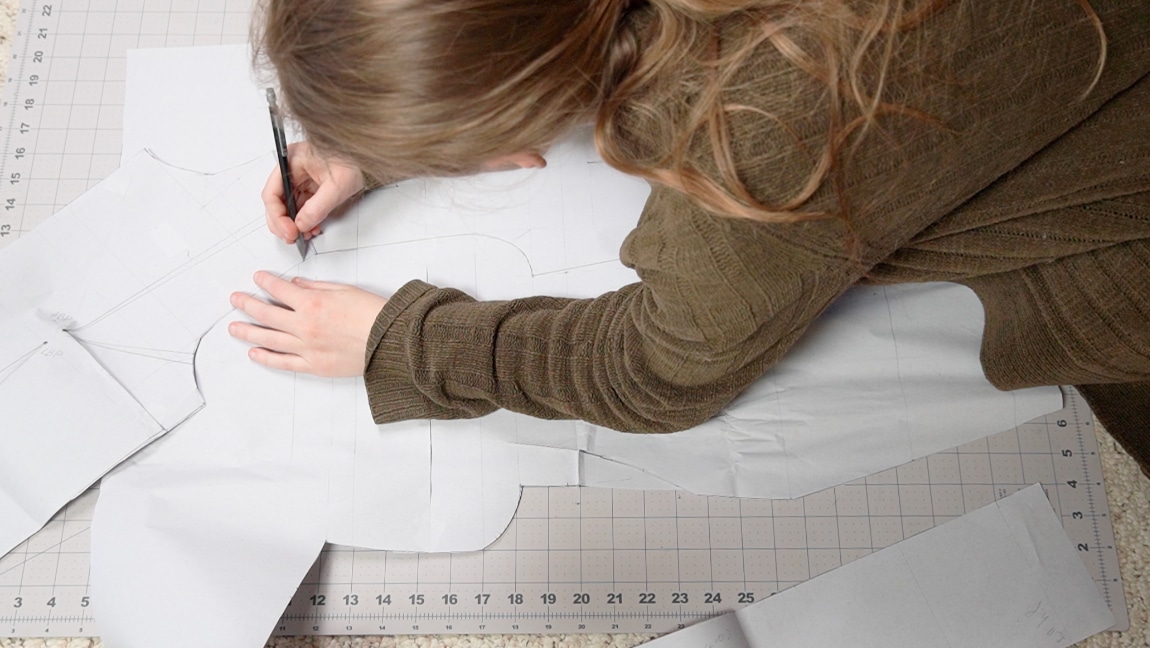
Step 3
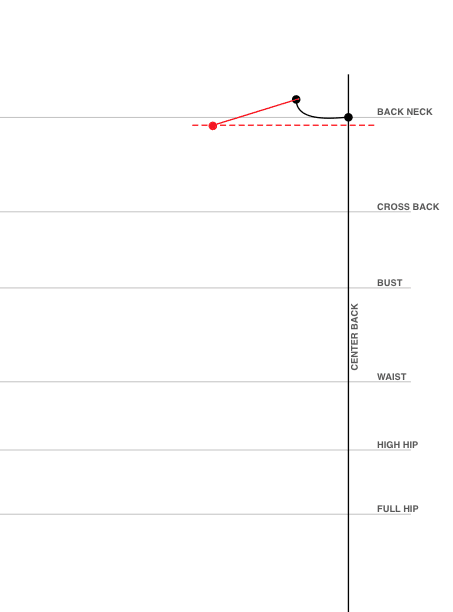
draw your back shoulder and dart points
Divide your neck (front) calculation in 2. Then make a horizontal guideline that distance down from your shoulder point.
Add 1/2 inch to your shoulder measurement. Then draw a straight line using that length from the should point to the guideline.
Then add two points that are 1/2 inch apart at the center of the shoulder. These will be for the shoulder dart.
Step 4
draw your back waist
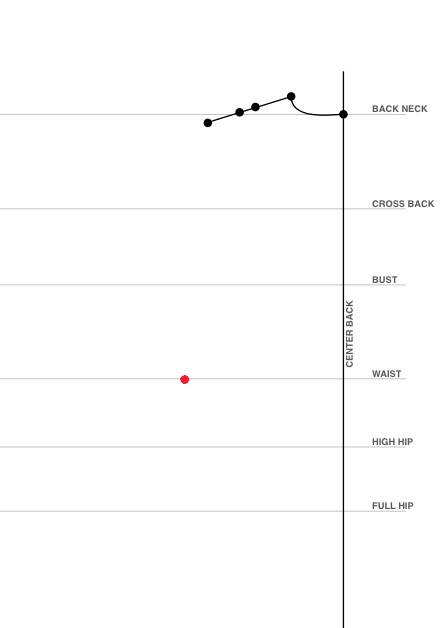
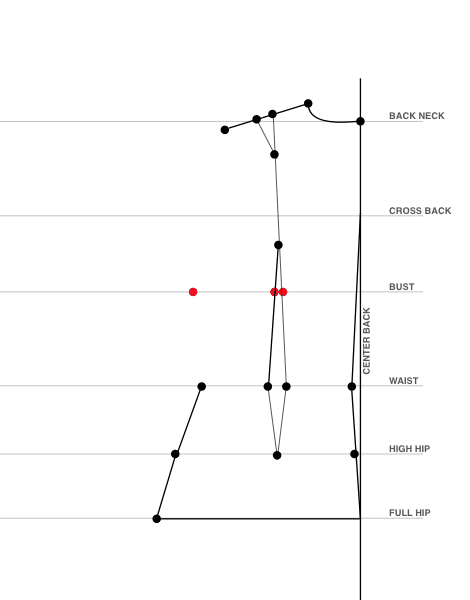
Add 1 inch to your waist (back) calculation. Then draw a point on the waist gridline.
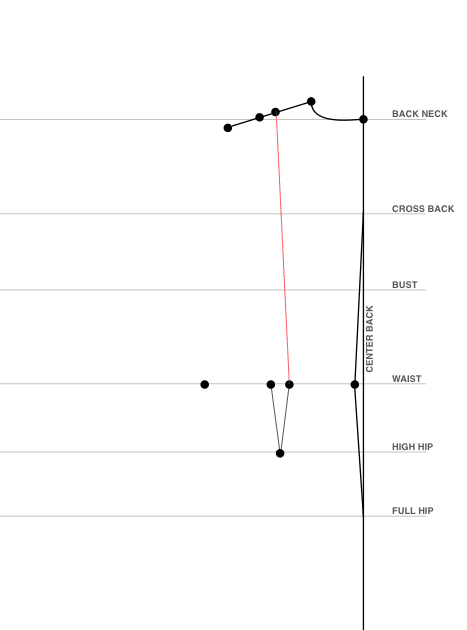
Step 5
draw you waist dart point
The back will have center back contouring and a waist dart. Together, these must equal 1 inch. Place the back contour dot 3/8 inch from the center back. Then place two more dots in the center of the waist. These two dots should be 5/8 inch apart.
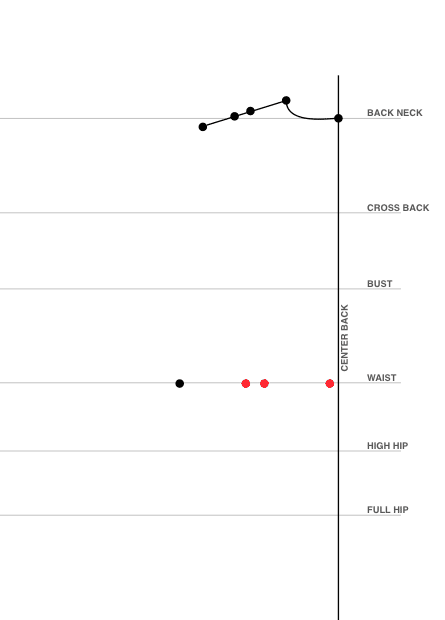
Step 6
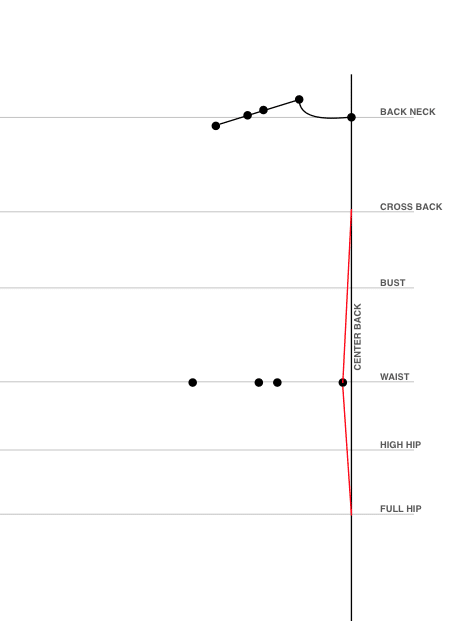
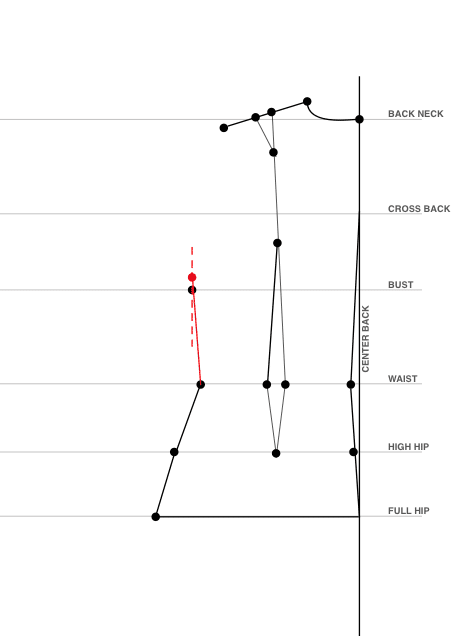
draw your center back seam
Draw straight lines connecting the center back dot the the cross back and the full hip grid lines at the center back. This is your new center back seam.
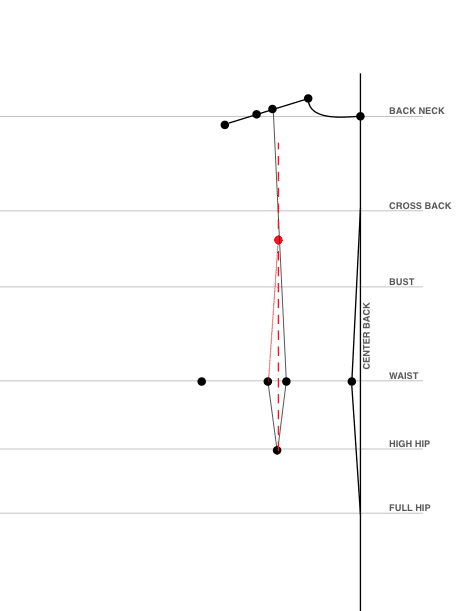
Step 7
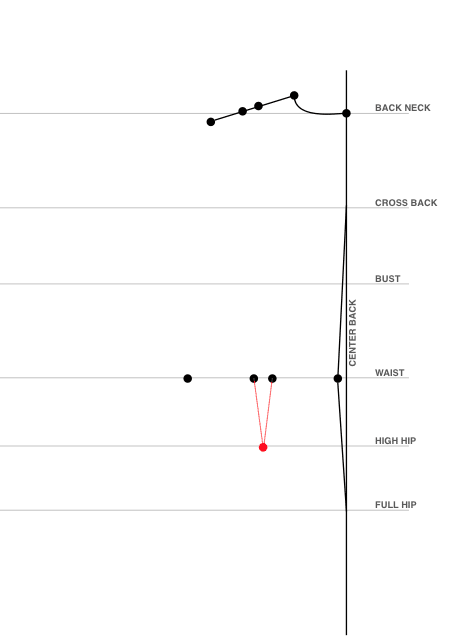
draw your waist dart
Draw a dart on the high hip centered underneath the two waist dart points and draw the legs of the dart.
Step 8
draw a line from waist dart to shoulder dart points
Connect the waist dart to the shoulder dart dots. This will be one leg of both darts.
Step 9
draw waist dart legs
Draw a guideline straight up from the high hip point. Then connect the other leg of the waist dart where this guideline intersects with the first leg.
Step 10
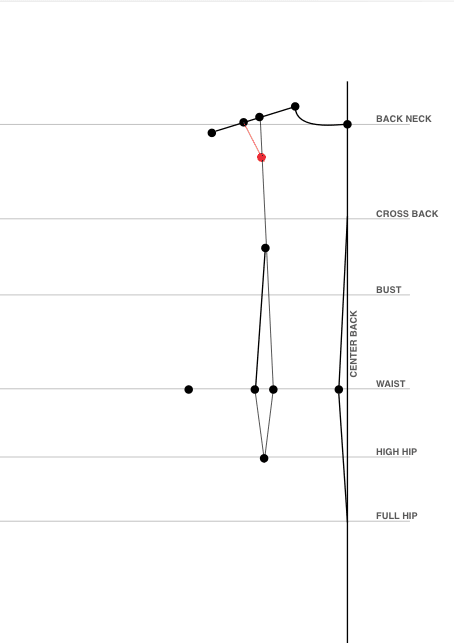
draw shoulder dart legs
Draw the second leg of the shoulder dart in. This dart is 4 inches long, so draw a 4 inch leg wherever is connects with the first one.
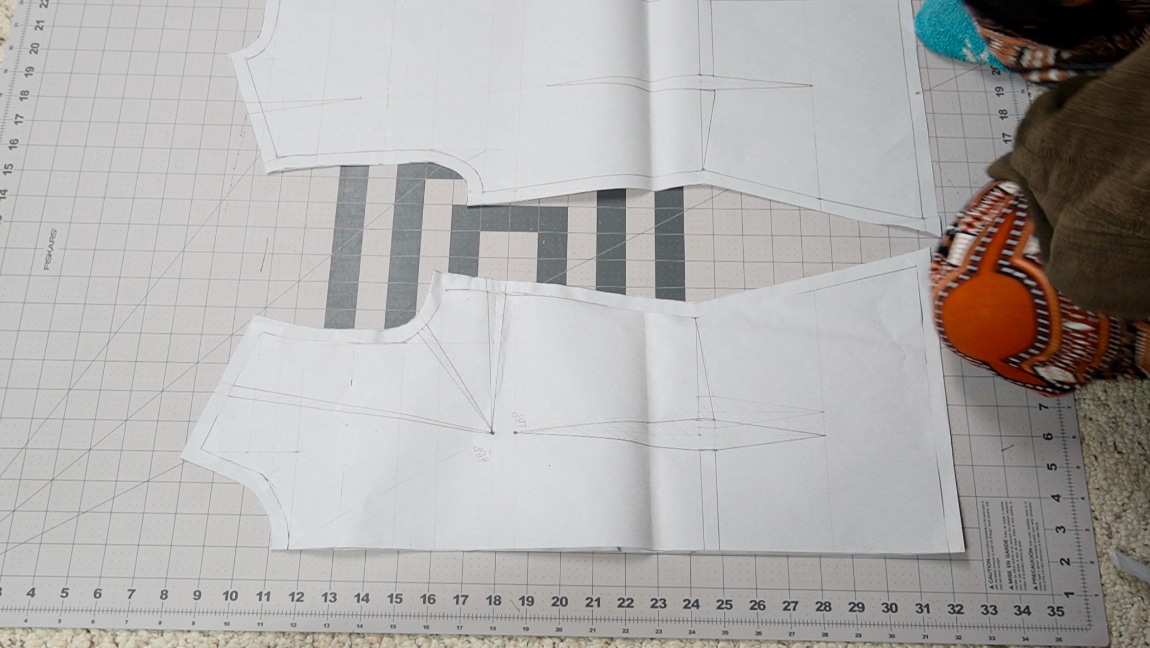
Step 11
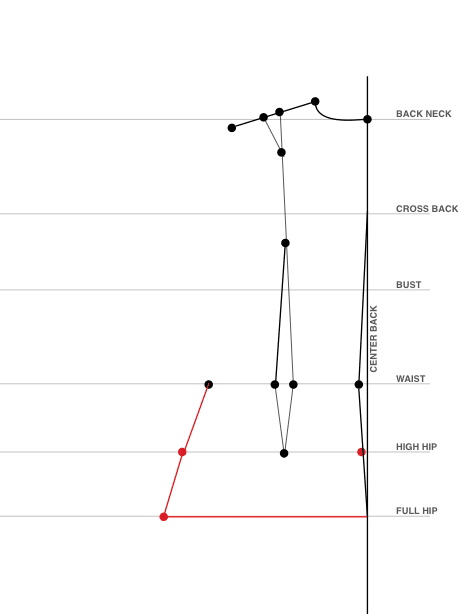
draw your high hip and full hip points
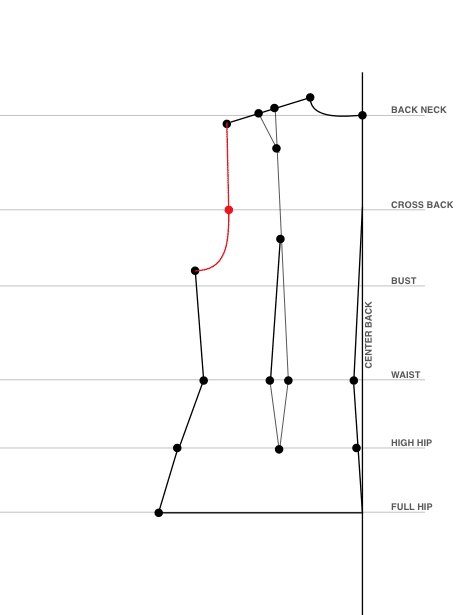
Add your high hip (back) and full hip (back) calculations. Remember, the back contouring goes through the high hip line. Measure your high hip from that point. Then connect the dots for the side of the sloper
Step 12
draw your bust point
Add the Bust (back) calculation. The dart takes up space on the bust line and will be folded out. Measure the distance lost in the dart and add it to the bust measurement before making your dot.
Step 13
draw your side length
Draw a vertical guideline through the bust point. The use your Side length to connect the waist point to the guideline.
Step 14
draw your cross back and arm hole
Add the Cross back calculation. Then draw in the armhole. Measure this armhole line and compare it to the armhole (back) calculation. You want your drawn line to be equal to or greater than the armhole (back) calculation.
Step 15
true the side and shoulder with the front of the pattern
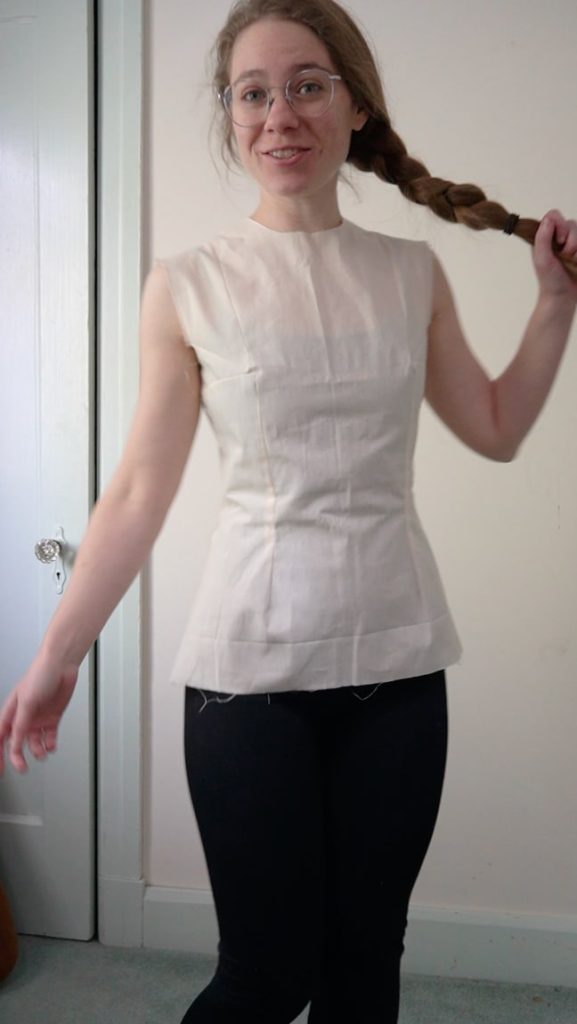
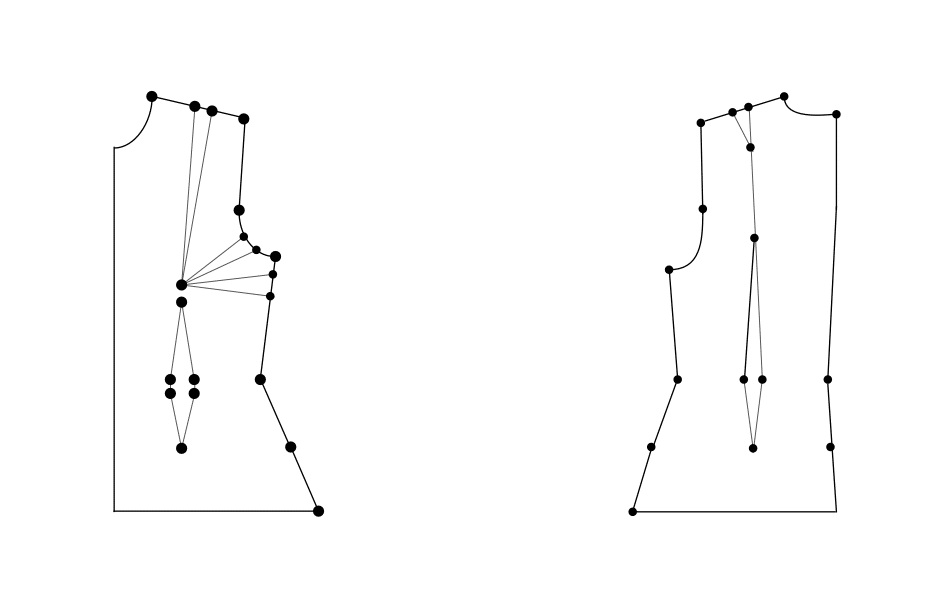
Now that you’ve finished the basic sloper. you need to make sure it matches the front. Place the side seam of the front on top of the back (with the front dart folded out) and make whatever adjustments you need for the sides of the front and back to match.
Then line up the shoulder seams and armholes to make sure there is a smooth curve from one piece to the next. There whould only be minor adjustments necessary for this part (1/4 inch or less)
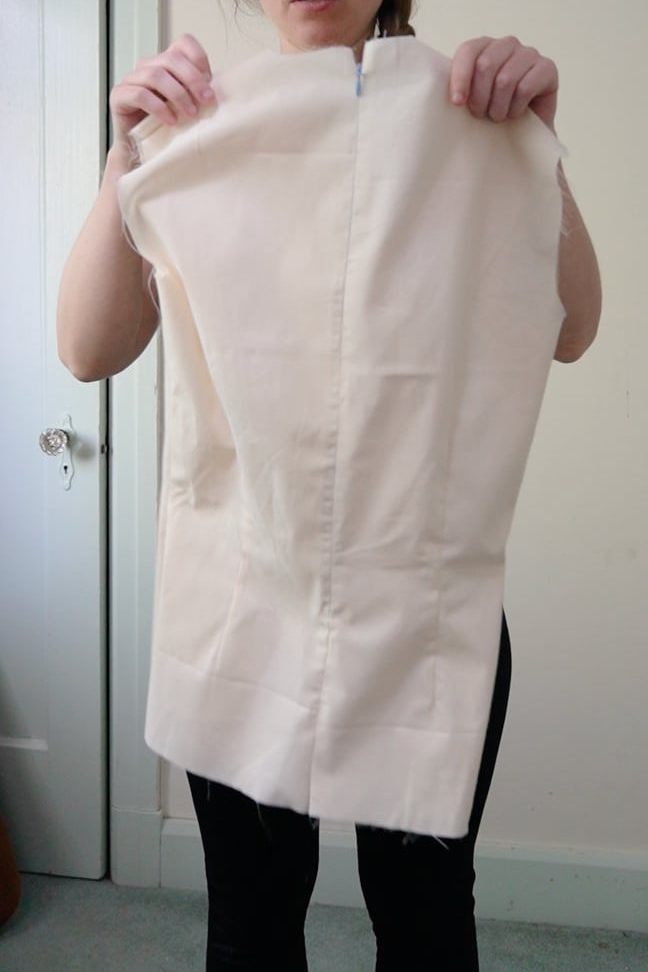
Step 16
add seam allowance
Add seam allowance to your pieces and cut them out with muslin. Use a zipper for the back since you won’t be able to fit this over your head. To sew the darts, I sewed each of them to a point 1/2 inch away from the bust point.
When you try it on, it should fit your body measurements pretty much perfectly.
Don’t forget to also follow part one of this tutorial for the front of the bodice
Finished!