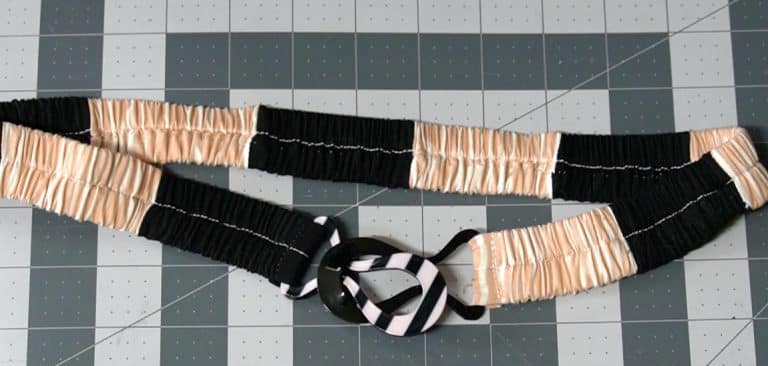
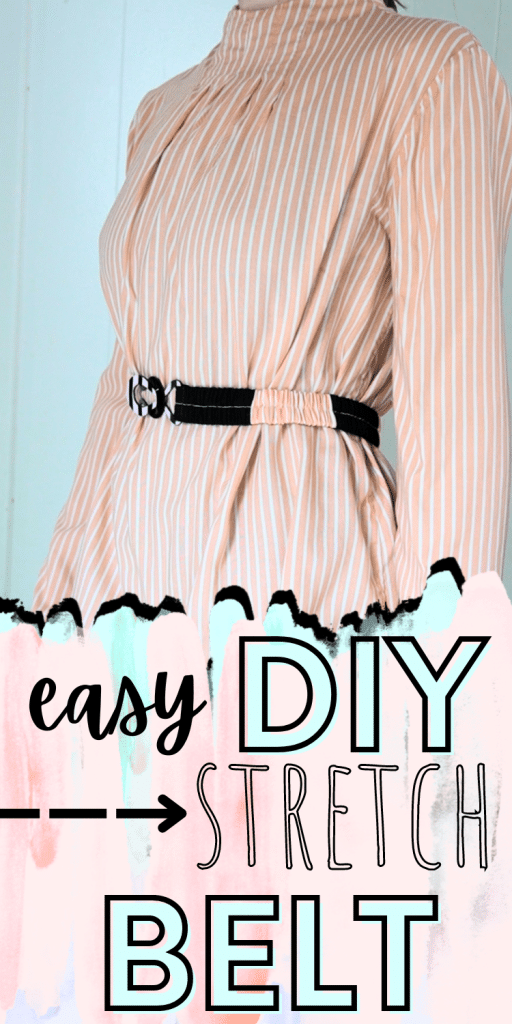
Tutorial: How to Make an Easy Elastic Belt with Scraps
This tutorial will teach you how to make an easy elastic belt, great for long-term adjustable clothing. I like to use scraps when making these simple projects because it reduces the overall waste from my sewing hobby, but you can use what ever length of fabric you want as you sew along.
Check out more DIY belt tutorials
This page contains affiliate links. As an Amazon Associate, I earn a small commission from qualifying purchases. That being said, I encourage you to use your local sewing shop whenever possible, or to look for supplies second hand.
Supplies Needed:

Step 1
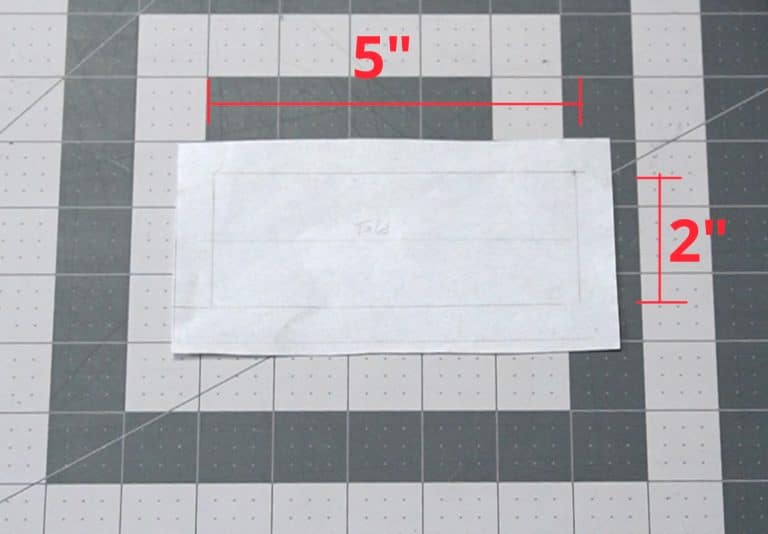
Draw a rectangle for your belt (add seam allowance)
Determine the length and width you want your belt to be. The width of the belt should be what ever fits on your clasp buckle multiplied by two (since it will be folded in half). In my case, the width of the buckle is 1 inch, so I need the width of the pattern to be 2 inches.
The length of the belt piece can be what ever you want. I chose 5 inches because that’s easy to multiply and estimate how many pieces I need.
Don’t forget to add seam allowance.
Step 2
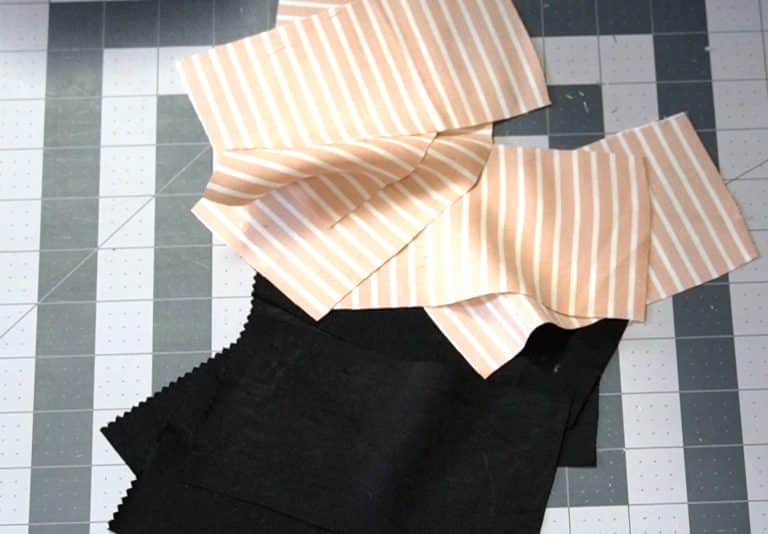
cut out your scrap belt pieces
Cut enough scrap pieces to fit around your waist twice. If you don’t want to do the math, you can just sew scraps together until you can wrap it around twice (because adding the elastic gathers the fabric and shrinks the width of the belt).
However, if you’re math minded like me you can figure out exactly how many pieces you need. To determine how many you will need to cut, measure your waist and multiply by 2. So if you have a 30 inch waist, you need a final belt length of 60 inches . Then you need to divide 60 by 5 inches (or the length of your belt pieces) to get the number you need to cut (12 pieces in this example). Note: it does NOT have to be exactly double since you can adjust the final size of the belt with the elastic.
Step 3
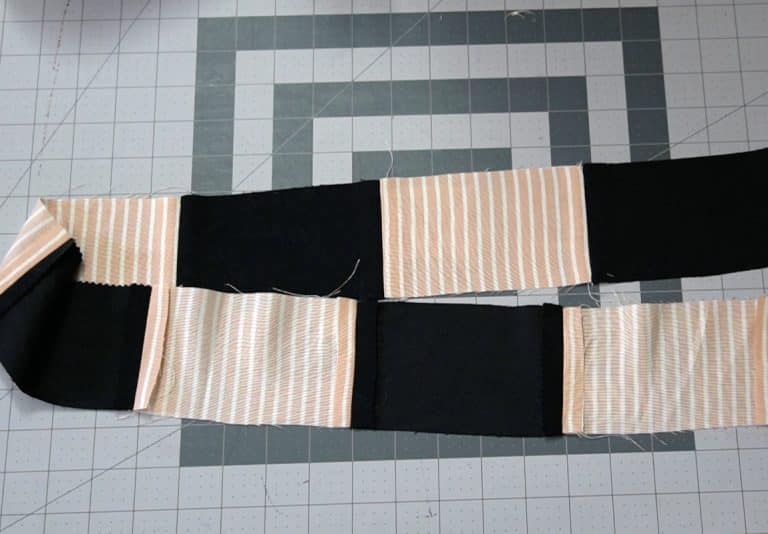
sew your scraps together and press the seams open
Pin your pieces together end to end, then sew them. Press the seams open to make the seam as flat as possible.
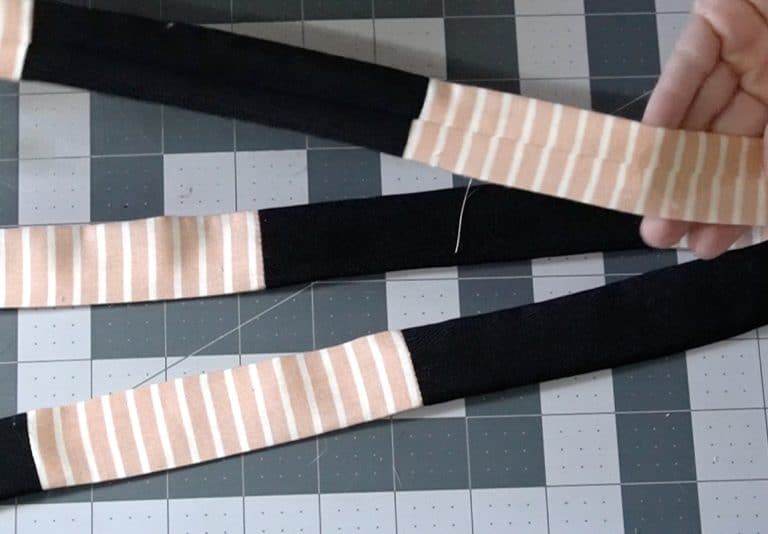
Step 4

fold in half and sew
Fold the belt in half and sew it lengthwise according to your seam allowance.
Step 5

press the seam open to the back
Press the seam open to the back of the belt so that it will not be visible on the front when you turn the belt right side out.
Step 6
turn the belt right-side out and press flat
Use a loop turner or what ever tools you prefer to turn the belt right side out. Press it flat with the seam on the back to the front looks clean.
Step 7
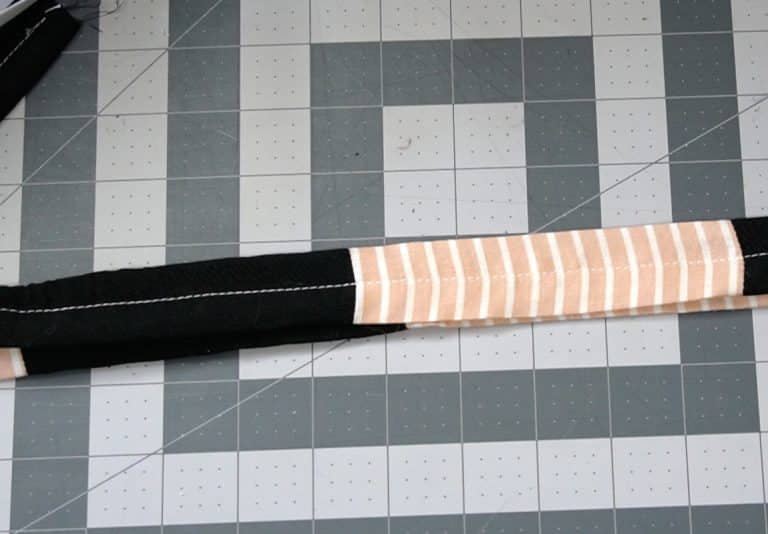
stitch a line down the center of the belt
To create the two casings for the elastic, sew a straight line down the center of the belt lengthwise.
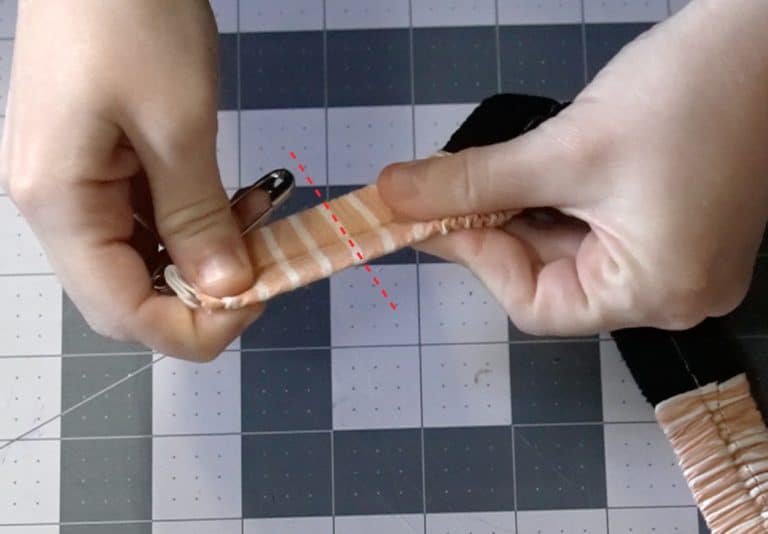
Step 8

insert elastic into both sides of the casing
Cut two strands of elastic that are approximately the length of your waist. Attach a safety pin to one side of each elastic strand and work the elastic through the casings. I find it easier to do one elastic casing at a time, but I know many people prefer to work them both through simultaneously. Do what ever comes easier to you.
After inserting the elastic through the casing, pull the ends until length feels good around your waist. Not loose, but not too tight either.
Step 9
sew the elastic in place
With the elastic pinned (or safety pinned) in place to keep it from sliding, pull the end straight and sew it in approximately 1 to 1.5 inches in from the edge. Do this on both sides of the belt.
Step 10
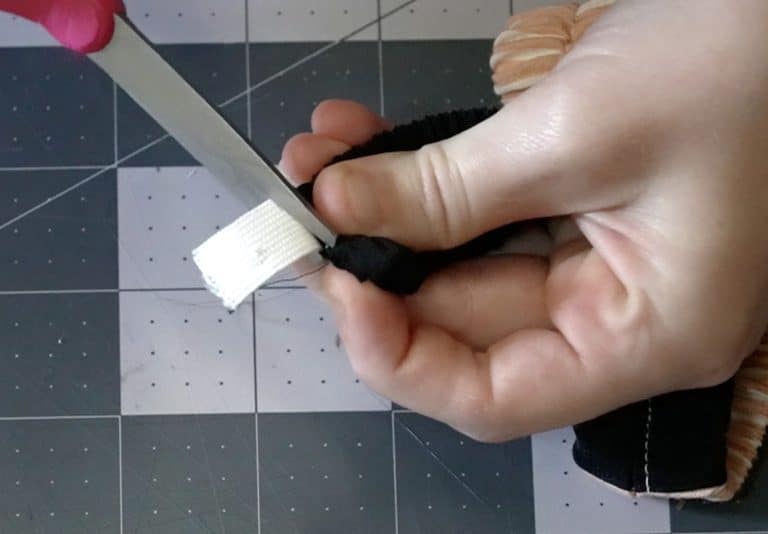
cut the excess elastic
After sewing in place, pull the fabric back and clip the excess elastic away so that last bit of belt is just fabric. Repeat for all for ends of the elastic.
Step 11

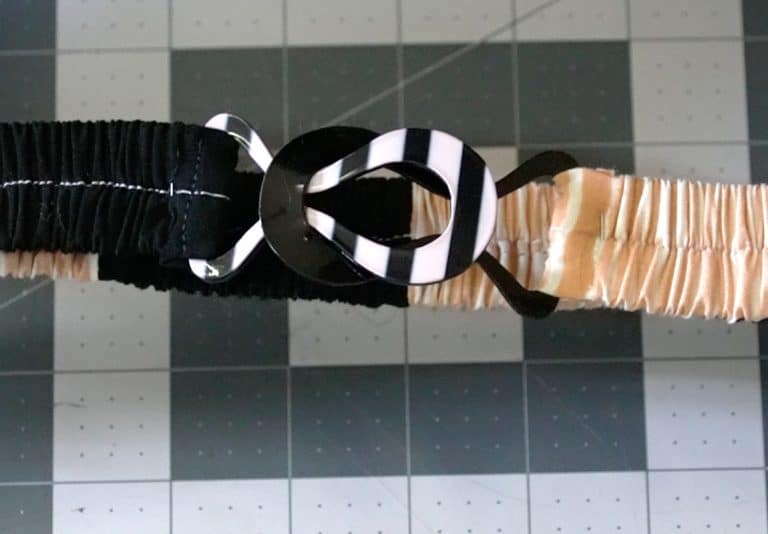
sew belt around buckle
Fold the belt over the buckle and sew it in place. It’s usually better to hand sew this so that the sewing machine doesn’t hit the buckle and you can hide your stitching on the reverse side of the belt.
Finished!